Transferring data to Looker Studio
This guide explains how to transfer data to Looker Studio to store and further process information.
Concept
Looker Studio is an Active Destination. After you set Looker Studio as the destination of a datastream, data is transferred to Looker Studio each time data is fetched for the datastream. For more information, see Destination types.
You can assign multiple destinations to a datastream. For more information on possible limitations, see Assigning multiple destinations to a datastream.
Prerequisites
Before you complete the procedure in this guide, perform all of the following actions:
-
Create a datastream whose data you want to transfer to Looker Studio. For more information on creating a datastream, see Introduction to collecting data.
-
Apply the correct Data Mapping for your datastream. For more information, see Introduction to harmonizing data.
Procedure
To transfer data from a datastream to Looker Studio, follow these steps:
-
Add Looker Studio as a destination to the workspace which contains the datastream or to one of its parent workspaces.
-
Assign the Looker Studio destination to the datastream.
Adding Looker Studio as a destination
To add Looker Studio as a destination to a workspace, follow these steps:
-
Select the workspace you work with in Adverity and then, in the , click Destinations.
-
Click + Add Destination.
-
Click Looker Studio.
-
In the Configuration page, fill in the following fields:
-
Name
-
(Optional) Rename the destination.
For more information on advanced configuration settings, see Looker Studio destination reference.
-
-
Click Next.
-
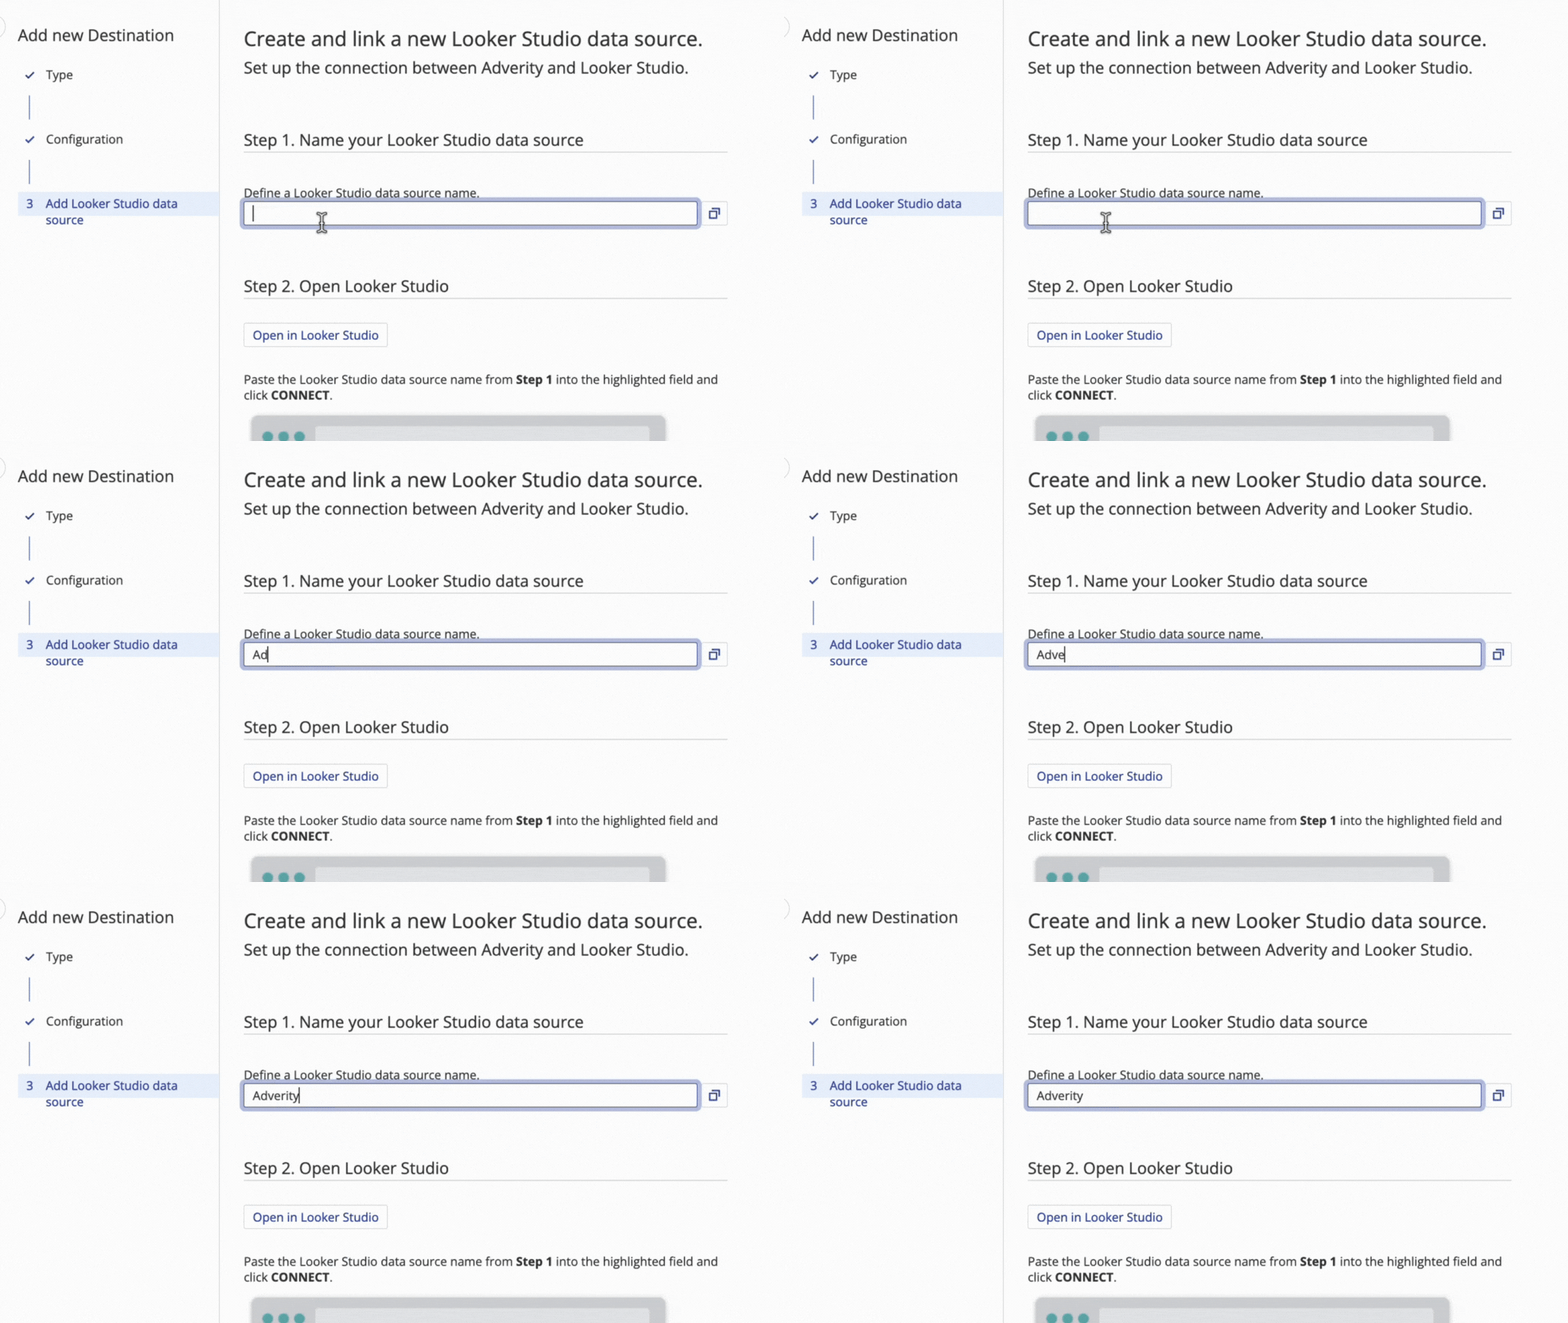
In Step 1: Name your Looker Studio data source, enter a name for the new Looker Studio data source. Click the
icon next to the field to copy the name.

-
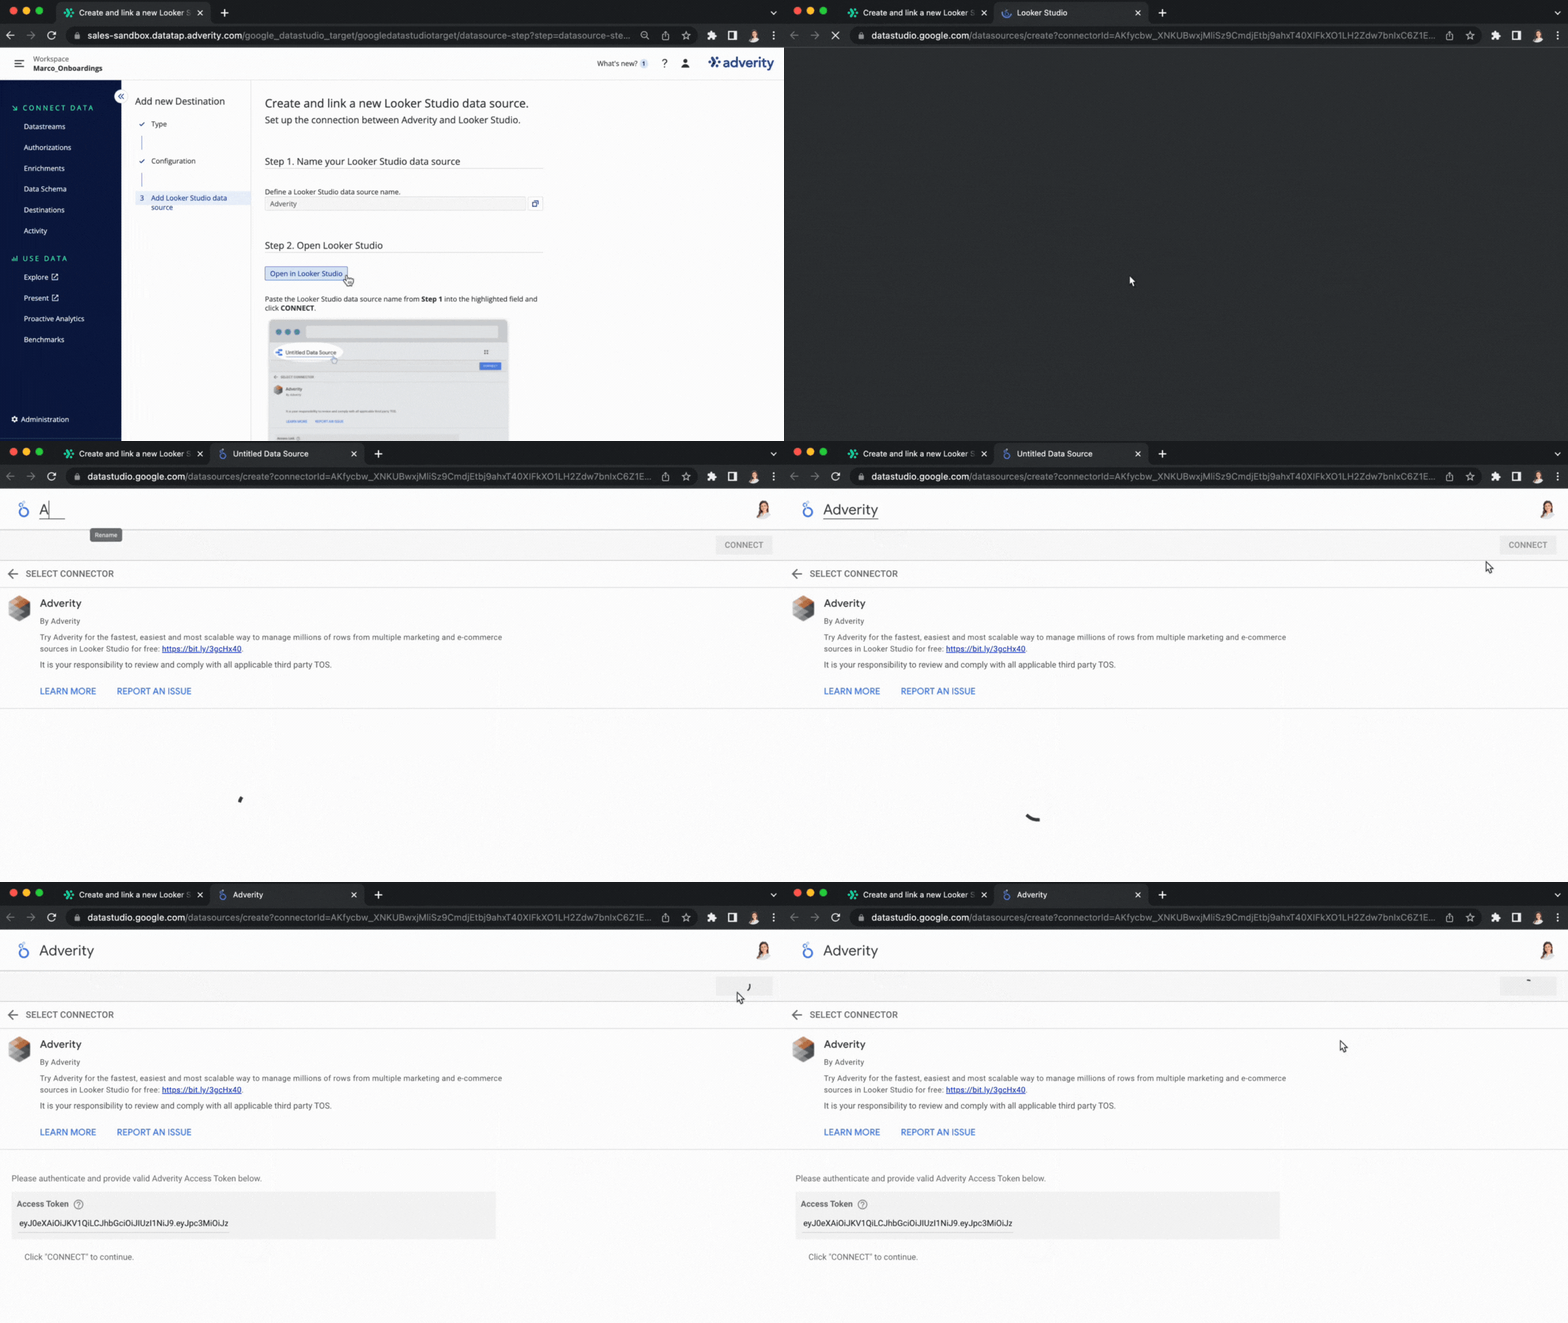
In Step 2: Connect Looker Studio, click Open in Looker Studio.
-
In the new Looker Studio tab that opens, paste the data source name that you copied earlier into the highlighted field, and then click CONNECT.

-
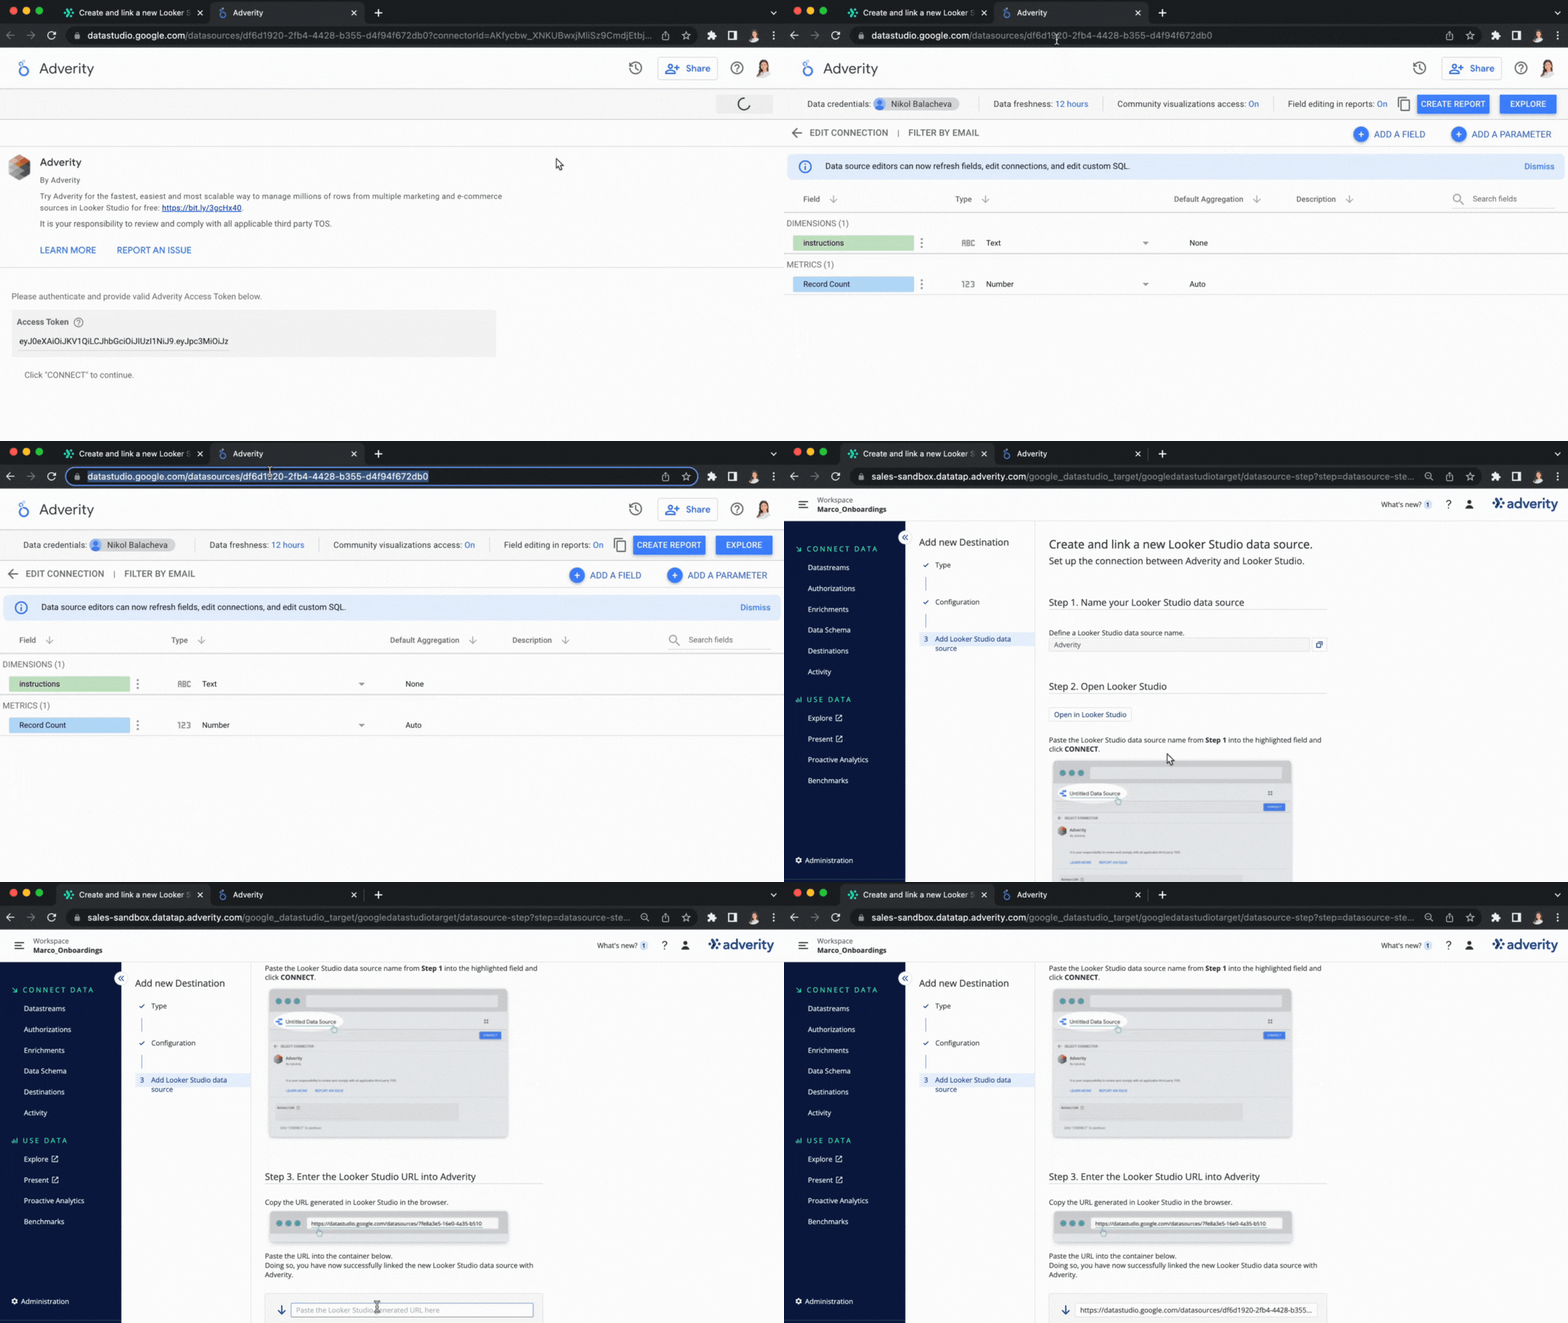
When the Looker Studio page loads, copy the URL for this tab.
-
In Step 3: Enter the Looker Studio URL into Adverity, paste the URL that you have just coped into the field.

-
Click Create.
Assigning Looker Studio as a destination
To assign the Looker Studio destination to a datastream, follow these steps:
-
Select the workspace you work with in Adverity and then, in the , click Datastreams.
-
In the Destinations section, click + Add Destination.
-
Click Assign existing destinations.
-
Select the Looker Studio checkbox in the list.
-
Click Save.
Configuring transfer settings
To configure transfer settings, follow these steps:
-
Select the workspace you work with in Adverity and then, in the , click Datastreams.
-
In the Destinations section, find the Looker Studio destination in the list, and click
on the right.
-
Click
Destination settings.
-
Fill in the following fields:
-
Looker Studio data sources
-
Select the data sources in the destination where to transfer data from the datastream.
-
Action for existing data
-
To specify how Adverity loads data from a data extract to the destination if the target table already exists, select one of the following options:
-
(Default) Select Overwrite to remove all data from the relevant table in the destination before transferring the corresponding data extract.
-
Select Append to update the relevant table in the destination with data from the data extract.
-
-
Partition by date
-
(Recommended) If selected, the target table is partitioned by a date column, and data is only replaced based on the date. This means that if you import data into a table with data already present for certain dates, the existing data for these overlapping dates is overwritten, and the data for other, unique dates remains unchanged.
Partitioning is set during the first data transfer and cannot be changed through Adverity later.
When this option is selected, select the Partition Date Column from the drop-down list.
-
-
Click Save.