Creating and applying tag rules
This reference outlines how to create and apply tag rules.
Introduction
Create tag rules to add tags to a data extract. A tag is a new value set by the user. Tag rules search for a given dimension value, and then add a tag to a new dimension or update an existing dimension value.
Adverity does not allow you to create rules for a workspace group. Rules can only be applied to a workspace.
Accessing the Tag Rules page
To access the Tag Rules page, follow these steps:
-
In the , click Explore.
-
Select the workspace you work with in Explore & Present.
-
In the , click Tag Rules.
Creating Tag rules
To create a
-
In the top right corner of the Tag Rules page, click
 Create/Apply Tag Rule.
 -
In Filter Dataset by Date, choose the date range to which the rule is applied.
-
(Optional) In Filter Dataset by Dimensions and Tags, add a filter to include or exclude data from the rule based on their dimension value.
To load existing Dimension filters, click
 Load and select the existing filter.
To add a dimension filter to the rule, follow these steps:
-
Click
 Add Dimension Filter.
 -
In the Dimension Filter pop-up window, fill the following fields:
-
Choose dimension
-
Select the dimension used in the filter.
-
Filter by
-
(Optional) Select the dimension values used in the filter search criteria. By default, the is operator is applied to the selected dimension value. This means the selected value must be an exact match. To change the operator to contains, starts with, or ends with, click on the is operator. An example of the is operator is shown in the figure.
-
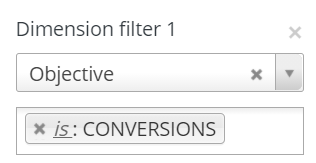
A dimension filter with the is operator applied to the selected dimension value.
-
+ Add Dimension Filter
-
(Optional) To add another dimension value to the filter search criteria. Filters with multiple dimension filters use AND logic. This means only the dimension values that match all the filters are included in the rule.
-
Exclude
-
(Optional) To exclude the selected dimension values from the filter, select the Exclude checkbox.
-
-
To create the Dimension Filter, click OK.
-
-
In Define Tag Rules
-
For source dimension
-
Select the dimension for which the tag rule will search.
-
If value contains:
-
Enter the dimension value for which the tag rule will search. To use regular expressions in this field, select the Regexp? checkbox.
-
Then put value (tag)
-
Enter the new value (or tag) to populate the target dimension. The target dimension can be an existing dimension or a new dimension.
-
Into target dimension
-
Select the dimension populated with the tag. To add the tag to a new dimension, follow these steps:
-
In the Into target dimension field, click
 Delete next to the name of the selected dimension.
 -
In the activated or enter new dimension field, enter the name of the new dimension populated with the tag.
-
-
Add another rule
-
(Optional) To add another rule to a ruleset, click Add another rule and populate the fields.
-
-
(Optional) To add another
-
Choose one of the following options:
-
To create the rule without applying it to the dataset, follow these steps:
-
Click Save as....
-
In the Rule pop-pop window, in the Name field, provide the name of the
-
Click OK.
-
-
To apply the rule to the dataset, click Apply this tag rule now. A progress bar appears at the bottom of the page. Once the rule has been completed a success message appears.
-
Applying an existing tag rule
To apply an existing
-
Find the existing
-
At the bottom of the page, click Apply this tag rule now.
A progress bar appears at the bottom of the page. Once the rule has been completed, a success message is displayed.
Updating and deleting a tag rule
To update or delete a
-
Find the existing
-
To update the existing
-
To delete the existing
A confirmation message does not appear when you click Delete, be sure you want to delete a rule before clicking Delete.